Como Creaar un Non-CDB Database en ExaCS
Bueno para este caso se debe de trabajar por consola y ejecutar los comando con cuenta root.
En Oracle Exadata Cloud Service (ExaCS), mediante dbaascli, puede crear una base de datos Oracle Non-CDB. Primero creará un home de Oracle Database con una versión disponible y luego creará una base de datos en ese home de Oracle Database. Aquí, veremos pasos con un ejemplo para crear una base de datos no CDB 19c con el parche 19.19.
[root@vmnodo01 ~]# dbaascli database create --dbName PRDB19 --oracleHome /u02/app/oracle/product/19.0.0.0/dbhome_1 --createAsCDB false
DBAAS CLI version 23.1.2.0.0
Executing command database create --dbName PRDB19 --oracleHome /u02/app/oracle/product/19.0.0.0/dbhome_1 --createAsCDB false
Job id: 2f83dde8-6b92-4885-a468-2153060760ec
Session log: /var/opt/oracle/log/PRDB19/database/create/dbaastools_2023-07-04_04-13-59-PM_215882.log
Enter SYS_PASSWORD:
Enter SYS_PASSWORD (reconfirmation):
Enter TDE_PASSWORD:
Enter TDE_PASSWORD (reconfirmation):
Loading PILOT...
Enter SYS_PASSWORD ***************
Enter SYS_PASSWORD (reconfirmation): ****************
Enter TDE_PASSWORD ******************
Enter TDE_PASSWORD (reconfirmation): ******************
Session ID of the current execution is: 1872
Log file location: /var/opt/oracle/log/PRDB19/database/create/pilot_2023-07-04_04-14-17-PM_218873
-----------------
Running Plugin_initialization job
Completed Plugin_initialization job
-----------------
Running Default_value_initialization job
Completed Default_value_initialization job
-----------------
Running Validate_input_params job
Completed Validate_input_params job
-----------------
Running Validate_cpu_availability job
Completed Validate_cpu_availability job
-----------------
Running Validate_asm_availability job
Completed Validate_asm_availability job
-----------------
Running Validate_disk_space_availability job
Completed Validate_disk_space_availability job
-----------------
Running validate_users_umask job
Completed validate_users_umask job
-----------------
Running Validate_huge_pages_availability job
Completed Validate_huge_pages_availability job
-----------------
Running Validate_hostname_domain job
Completed Validate_hostname_domain job
-----------------
Running Install_db_cloud_backup_module job
Skipping. Job is detected as not applicable.
-----------------
Running Perform_dbca_prechecks job
Completed Perform_dbca_prechecks job
-----------------
Running Validate_backup_report job
Skipping. Job is detected as not applicable.
-----------------
Running Setup_acfs_volumes job
Completed Setup_acfs_volumes job
-----------------
Running Setup_db_folders job
Completed Setup_db_folders job
-----------------
Running DB_creation job
Completed DB_creation job
-----------------
Running Create_db_from_backup job
Skipping. Job is detected as not applicable.
Completed Create_db_from_backup job
-----------------
Running Load_db_details job
Completed Load_db_details job
-----------------
Running Populate_creg job
Completed Populate_creg job
-----------------
Running Register_ocids job
Skipping. Job is detected as not applicable.
-----------------
Running Run_datapatch job
Skipping. Job is detected as not applicable.
-----------------
Running Create_users_tablespace job
Skipping. Job is detected as not applicable.
-----------------
Running Configure_pdb_service job
Skipping. Job is detected as not applicable.
-----------------
Running Set_pdb_admin_user_profile job
Skipping. Job is detected as not applicable.
-----------------
Running Lock_pdb_admin_user job
Skipping. Job is detected as not applicable.
-----------------
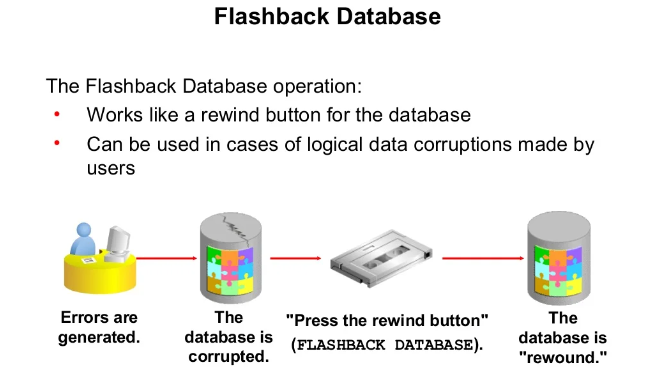
Running Configure_flashback job
Completed Configure_flashback job
-----------------
Running Update_cloud_service_recommended_config_parameters job
Completed Update_cloud_service_recommended_config_parameters job
-----------------
Running Update_distributed_lock_timeout job
Completed Update_distributed_lock_timeout job
-----------------
Running Configure_archiving job
Completed Configure_archiving job
-----------------
Running Configure_huge_pages job
Completed Configure_huge_pages job
-----------------
Running Set_credentials job
Completed Set_credentials job
-----------------
Running Update_dba_directories job
Completed Update_dba_directories job
-----------------
Running Set_cluster_interconnects job
Completed Set_cluster_interconnects job
-----------------
Running Create_db_secure_profile job
Completed Create_db_secure_profile job
-----------------
Running Set_utc_timezone job
Completed Set_utc_timezone job
-----------------
Running Run_dst_post_installs job
Completed Run_dst_post_installs job
-----------------
Running Enable_auditing job
Completed Enable_auditing job
-----------------
Running Apply_security_measures job
Completed Apply_security_measures job
-----------------
Running Set_listener_init_params job
Completed Set_listener_init_params job
-----------------
Running Update_db_wallet job
Completed Update_db_wallet job
-----------------
Running Add_oratab_entry job
Completed Add_oratab_entry job
-----------------
Running Configure_sqlnet_ora job
Completed Configure_sqlnet_ora job
-----------------
Running Configure_tnsnames_ora job
Completed Configure_tnsnames_ora job
-----------------
Running Enable_fips job
Completed Enable_fips job
-----------------
Running DB_backup_assistant job
Completed DB_backup_assistant job
-----------------
Running Restart_database job
Completed Restart_database job
-----------------
Running Create_db_login_environment_file job
Completed Create_db_login_environment_file job
-----------------
Running Generate_dbsystem_details job
Completed Generate_dbsystem_details job
-----------------
Running Cleanup job
Completed Cleanup job
dbaascli execution completed
[root@vmnodo01 ~]#
[root@vmnodo01 ~]# su - oracle
Last login: Tue Jul 4 16:32:49 -04 2023
Last login: Tue Jul 4 16:32:58 -04 2023 on pts/0
[oracle@vmnodo01 ~]$ ps -fea |grep smon
root 131034 1 3 Jun15 ? 14:27:16 /u01/app/19.0.0.0/grid/bin/osysmond.bin
grid 133341 1 0 Jun15 ? 00:00:23 asm_smon_+ASM1
oracle 395509 1 0 20:32 ? 00:00:00 ora_smon_PRDB191
[oracle@vmnodo01 ~]$ srvctl status database -d PRDB19
Instance PRDB191 is running on node vmnodo01
Instance PRDB192 is running on node vmnodo02
[oracle@vmnodo01 ~]$ ll
-rwxrwx--- 1 oracle oinstall 631 Jul 4 20:32 PRDB19.env
[oracle@vmnodo01 ~]$ . PRDB19.env
[oracle@vmnodo01 ~]$ sqlplus "/as sysdba"
SQL*Plus: Release 19.0.0.0.0 - Production on Tue Jul 4 20:33:42 2023
Version 19.19.0.0.0
Copyright (c) 1982, 2022, Oracle. All rights reserved.
Connected to:
Oracle Database 19c EE Extreme Perf Release 19.0.0.0.0 - Production
Version 19.19.0.0.0
SQL> select name, cdb from v$database;
NAME CDB
--------- ---
PRDB19 NO